A quick, fun project with the kids!
Tonight, Max was contentedly coloring away, when his crayon suddenly broke in two. Pitifully, he looked at me and, "Now it's no good, Mommy." Oh, you know that look... it's up there with the "I just dropped my ice cream" face. It's endearing and heart-melting, yet amusing all at once.
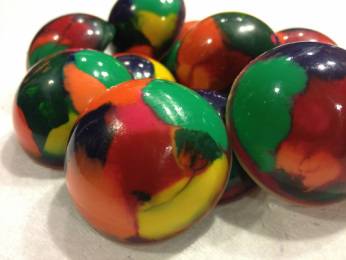
For whatever reason, I remembered how we used to melt down our old crayons into "Magic Crayons" when we were kids. Mom would break out an old muffin pan, toss in the crayon pieces and after a few minutes at 300 degrees, we had circular crayons of every color.
So tonight, I told Max: "Buddy, that crayon is still good. Let's give it a second chance - what do you say?"

Pre-soaking the crayons helps the labels peel off easily.
The Stuff:______________________________
- Broken Crayons
- Cakepop Tins / Muffin Tins / Corn Bread Tins
- 9 x 13 pan
- Heavy Bladed Knife (Butcher / Chef)
- Olive Oil Spray (We used Pam Organic Olive Oil)
- Oven at 300 degrees
_________________________________________
- Broken Crayons
- Cakepop Tins / Muffin Tins / Corn Bread Tins
- 9 x 13 pan
- Heavy Bladed Knife (Butcher / Chef)
- Olive Oil Spray (We used Pam Organic Olive Oil)
- Oven at 300 degrees
_________________________________________

A 9 x 13 Cake Pan comes in super handy!
* First, Max and I preheated the oven to 300 degrees.
* While it warmed up, we picked through all the crayons and took out the broken ones.
* We placed them in the 9 x 13 pan, and sprayed a little water on them. This helped the labels peel off more easily.
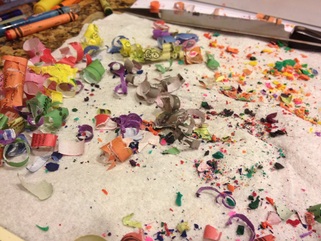
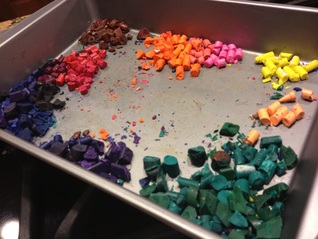
* Then, we used the knife to chop up the crayons into small pieces. We did this inside the 9 x 13 pan, as the sides of the pan helped keep the crayons from scattering everywhere as we chopped them up. Less mess! Note: Don't try to use a paring knife - use a heavy bladed knife like a butcher or chef knife.
* Once we had some nice colorful piles, we took a cake pop tin and lightly sprayed it with olive oil.
* We then placed a few pieces of crayon from each color pile into the cake pop slots.
* Oven time! We tossed them in, and turned on the oven light to watch the crayons melt together.
* Once the crayons looked nice and liquid (about 10-15 minutes) we removed them from the oven.
* I poured an ice bath into the 9 x 13 pan and placed the cake pop tin into it. The ice bath helps the crayons cool more quickly, and they release from the tin much easier.
* After about 15 minutes, simply turn over the pan, and ta-dah! Magic Crayons!

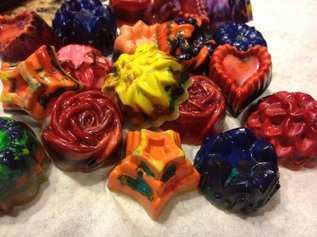
Such fun, we made Magic Crayons in all different shapes!
Max's broken crayons now had second chance at fun. We called them "Magic Crayons" since they are so many colors rolled up in one!
These are great to toss in a bag or purse for that "emergency entertainment" we sometimes need at restaurants or doctors offices.
Plus, they're sort of fun little gifts or stocking stuffers.
And, not only are they cool looking, they were made by recycling and reusing something that might otherwise ended up in the trash. Easy to make, easy to love!
 RSS Feed
